How Can You Strengthen Your Bone By Yoga?
If you know about Yoga, you must be aware of many of the benefits this practice entails. It combines your physical, mental and spiritual self to work towards a healthier life which should be everyone’s priority. Whereas some take on cardio or weight lifting for a fit body, others embark on the Yoga journey to avail all the opportunities it grants the individual.
Now, of course, many know how Yoga helps to increase the flexibility of the muscles, strengthens your muscles and relieves stress. It helps ease the mind and body together to allow better functionality. However, a lot of individuals are unaware of one of the most important benefits of Yoga: Bone strengthening.
Men and women both suffer from osteoporosis, however, women are usually more inclined to suffer from this bone-thinning disease due to their bone structure already being comparatively weaker than their opposite sex. Other than this, they also go through a sudden deprivation of estrogen as they cross menopause, a hormone which initially helps prevent bone loss.
After a certain age, your bone mass stops building up and you make do of what you have. But it is quite likely that as you age, your bones become weaker and are inclined towards possible injuries and fractures much easier than before. However, research suggests that you can maintain a strong skeleton if you start off yoga as it builds the protective bone mass!
So if you plan to keep your bones happy and healthy for a prosperous life, it is time for you to walk down the enlightening Yogi path. Whatever yoga pose or exercise you may start, just know that with it, you are strengthening and building your bones.
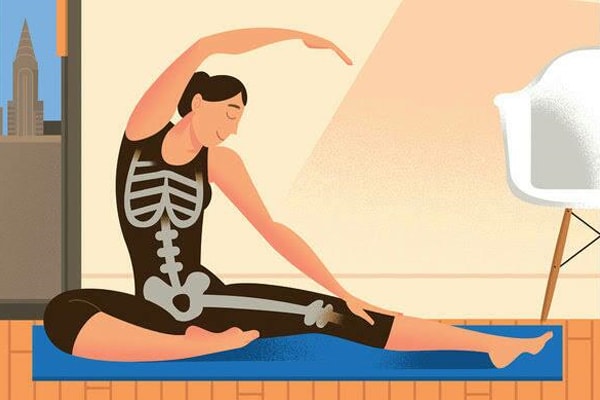
This is possible as the different muscles oppose one another during these poses that boost cells outside of the bone responsible for bone-making. As these osteoblasts are stimulated, those cells are converted to bone embedding cells called osteocytes.
Research suggests that Yoga can help not only strengthen the bones but stall or reverse the weakened states which follow as you grow older. Most importantly, women’s new bone accumulation was suggested to end after they enter menopause. Obviously, that was grim news.
However, the new studies note that whether the individual was young or old if they practiced certain modified Yoga poses regularly, their bone density improved – especially in the femurs and spine.
Moreover, you will find yourself more agile and balanced as you adopt the Yoga life which helps prevent injuries and fractures. And of course, Yoga is extremely well known to not only help your body find a balance but your mind too. It also relieves the stress and tension physically by decreasing the cortisol levels whilst also allowing a mindful experience to be present at the moment.
Is this not absolutely wonderful to know? So if you worry that your bones are weakening or want to make sure they do not in the future, you can try out these 12 minutes of Yoga to ensure you prevent bone loss.
Make sure the alignment is great otherwise if your muscles are not pulling at those joints, the poses are not going to work effectively for muscle or bone strengthening.
Also Read: Best Exercises/Workout Ideas for Couple 2018
Loren Fishman, a well-known author, and MD has researched largely on the effects of Yoga on osteoporosis and takes a keen interest in integrative medicine and Yoga.
He suggested some bone-health poses in collaboration with Terry Roth Schaff, C-IAYT who helped with the instructions and study. Just take a deep breath and be sure to hold each pose for at least 30 seconds (for each side) and easily practice them in the comfort of your home.
Let’s begin!
The 12 minutes Bone Strengthening Yoga Routine
1. Tree Pose (Vrksasana)
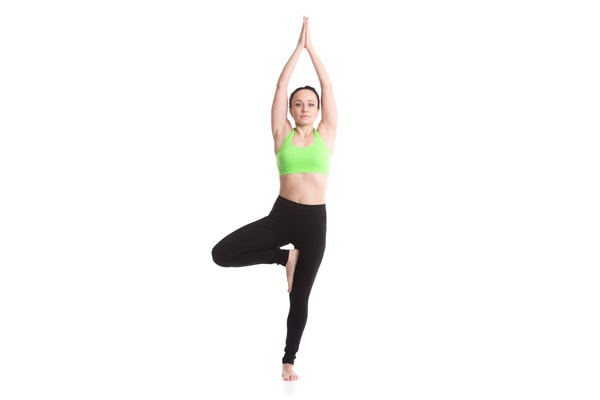
First, you need to take on the Mountain Pose, also known as Tadasana. After that, you are supposed to move your right thigh outwardly without turning your pelvis. This is accomplished by bending your right knee and setting your right foot either above the knee of your left leg or the ankle. However, you need to be sure to place the foot above the knee and not on it. With all this done, bring your hands in front of your chest and press both palms against one another. In short; do the Namaste. Be sure that after every pose, you take your time to slowly return to relaxation.
2. Extended Triangle Pose (Utthita Trikonasana)
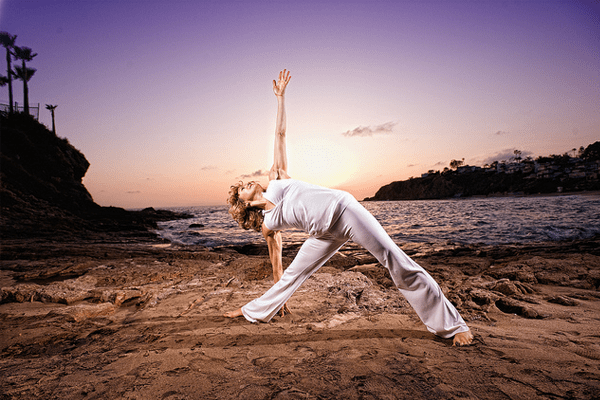
Form a wide stance by spreading your legs apart but maintaining balance and firmness. After that, rotate your left leg foot and knee in accordance to a 90-degree angle but it must stand out to be ticking almost 5:00 on the clock. Keep your torso frontal as much as possible and stretch it over your left leg. You may find yourself bending sideways to do so. As for your hands, stretch your right arm upwards and your left arm downwards by placing it on the floor. If that is too difficult, you can place it on your shin or a block nearby your left leg.
3. Revolved Triangle Pose (Parivrtta Trikonasana)
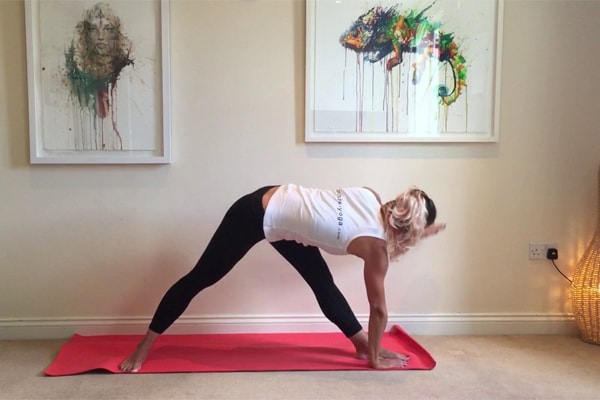
This is very similar to the Extended Triangle Pose, but with just a minor change. Instead of your right arm being stretched upwards and your left arm stretched downwards to be placed on either the floor, the shin or a block, you will twist your torso towards the back. So instead of your torso being frontal, you will find yourself turned to look back. Your right foot would be at a 90-degree angle whereas your left foot would be somewhere between the angle 45-60 degrees. Make sure both of your heels are aligned! Also, make sure that left heel remains grounded when you bring your left hip bone around the right as you find yourself leaning forward on your front right leg. Do the same for your opposite side once you have exhaled and slowly retracted to a neutral position.
4. Warrior Pose II, Virabhadrasana II
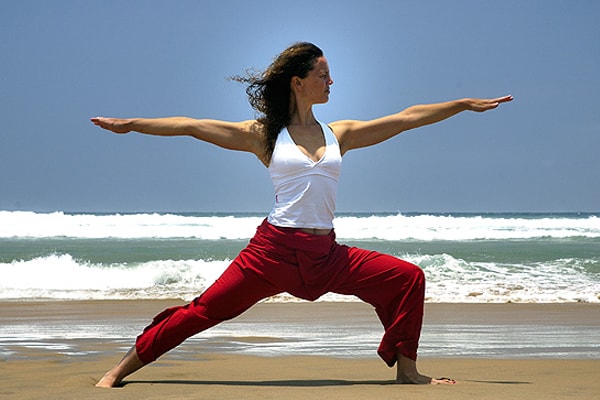
You start off with a wide stance again, rotate your left leg at a 90 degrees angle. This way, you will find your left foot and knee in the same angle much similar to the Extended Triangle Pose. But this time, you bend your left knee over your left foot in such a manner that it is absolutely straight with your knee not protruding beyond your left foot’s toes. Stretch your arms out wide towards each side at shoulder height and hold the pose with steady breathing. You are a warrior!
5. The Extended Side Angle Pose (Utthita Parsvakonasana)
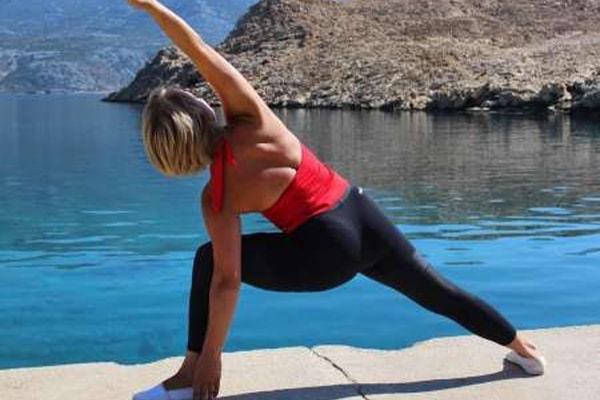
This is where you take off from your Warrior Pose II and just extend your torso while you stretch your right arm diagonally over your right ear basically. It would seem like you are just about to strike 2:00 on a clock! But that is not where it stops. Your left forearm should rest on your left thigh while the palm faces up. Make sure to stretch out your muscles and limbs as much as possible with your fingertips pointed and your right heel planted firmly.
6. Locust Pose (Salabhasana)
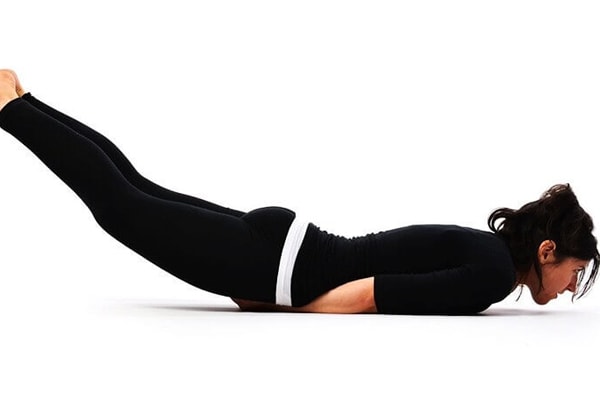
Time to get on the floor! No, literally. You need to lay down flat on your stomach, basically face-down with your arms straight alongside your torso. Now imagine you are flying in the air. Like you are one of the lost boys from Peter Pan! You raise your legs and chest up from the floor while your body remains intact with the floor by the stomach and thighs. Also, make sure your arms are raised alongside and above your torso in a rather straight fashion.
7. Bridge Pose (Setu Bandha Sarvangasana)
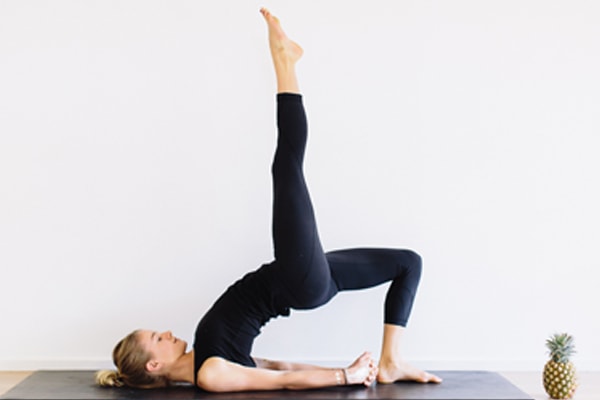
This is a pose that the majority are very familiar with. A lot of you probably did this as kids. Well, it is time to bring it back. In the bridge pose, you lay down on your back and bend your knees in an angle that it aligns completely straight with the heels of your feet. Once this is done, push your hips and torso upwards towards the ceiling. You will feel a stretch along your spine so be sure to do it slowly and not suddenly by pressing your heels against the floor as you do so. With your arms laid down on the floor, stretched out, clasp them together under your torso against the floor by intertwining your fingers to push your shoulders outward.
8. Reclining Hand-to-Big-Toe Pose I (Supta Padangusthasana I)
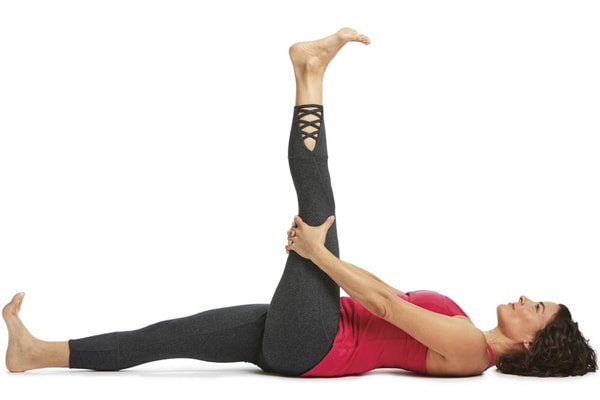
Lower yourself down onto your back straight against the floor slowly. Now grab a strap and hook it around your left foot. Make sure it is hooked against the ball of the left foot to make the pose effective as you hold onto the ends of the strap in each hand. Now that this is all done, you stretch out your left leg and make sure it is straight. Let it rise above slowly and towards the ceiling but you have to watch out as to whether your left setting bone moves or not.
9. Reclining Hand-to-Big-Toe Pose II (Supta Padangusthasana II)
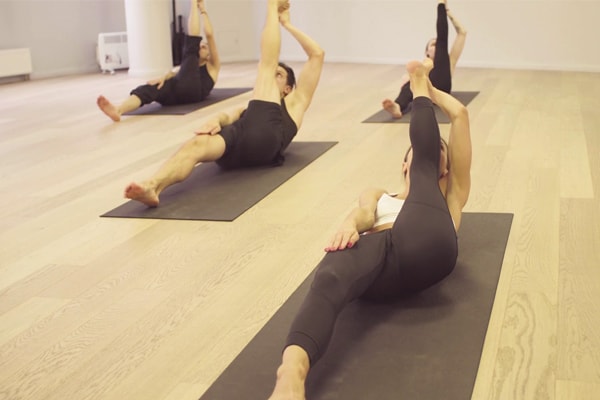
From the 7th pose, we move on directly to the 8th and that is the Reclining Hand-to-Big-Toe Pose II. Much similar to the previous one, it utilizes the strap but there are a few changes. Instead of holding each end of the strap in each hand, you hold both ends of the strap in your right hand. After this, you stretch it out flat towards your right side at shoulder level as you raise your right leg toward the right side and then bring it down closer to the floor. While doing all of this, extend your left arm out against the floor on your left side at shoulder level.
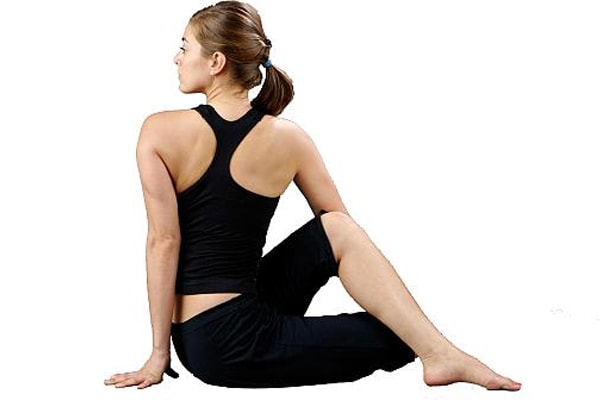
10. Straight Leg Spinal twist or Marichi’s Pose (Marichyasana C)
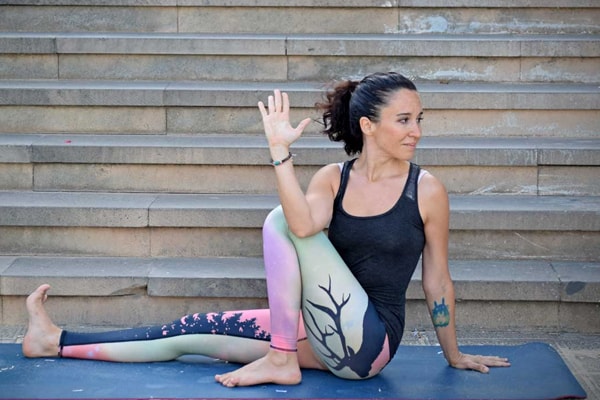
Sit down on the floor with your torso straight and your legs stretched out in front of you with little to no gap between them. Now bend your right knee to the point that your right heel is as close as possible to your right sitting bone. Try to keep a distance of about 8 inches between the left leg’s inner thigh and your right leg’s foot as it is grounded against the floor. Now extend your right arm behind you and place the palm flat on the floor right behind your right hip. However, your left elbow must be brought forward as it crosses over your right knee. And voila. Hold this pose and release it slowly as you do the same for the opposite side after it.
11. Seated Spinal Twist Pose (Ardha Matsyendrasana)
You start off the same way as you did for Marichi’s Pose, sitting on the floor with your legs strained out in front of you together. After this, bend your right knee but place the right foot on the floor outside your left thigh as the left leg remains straight and stretched out. Now turn your torso towards the right side and place your right hand on the floor behind your right hip bone. Next, place your left arm and practically wrap it loosely around your right leg’s knee. After this, take your left arm towards the outside of the right thigh as it presses against it as you twist your torso a bit further towards the right side while you breathe slowly. Remember to inhale for lengthening your spine and exhaling at each twist for at least 3 rounds until you switch to work on the opposite side.
12. Corpse Pose (Savasana)
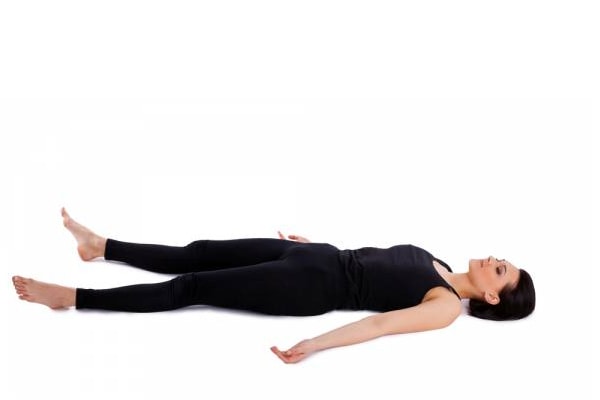
The corpse pose might be the easiest pose you could do but it is just as essential and a perfect end to this 12 minute Yoga sequence. Just lie down on your back against the floor and your legs spread apart just at the right hip-distance. Your heels would be under your knees as your shoulder blades are pressed against the floor. Other than this, you place your hands on your lower belly. After this is done, imagine as if your body suddenly unwinds from all of this. You stretch out each of your legs forward and let them fall down to hit the floor gently. After this, remove your hands from your lower belly and rest your arms alongside your torso, nice and open with your palms turned up.
Conclusion
All of these poses must be held for around 30 to 75 seconds for maximum effect and remember to work on both sides. If the right is mentioned specifically, does not mean you ignore your left side. You need to maintain your weight because being overweight won’t help you get the most out of your efforts, you can use the best fat burners such as Ultra Omega 7 Burn which is readily available in the web shops to see noticeable results. However, You will find this 12 minute Yoga sequence very beneficial for not only your body as your thinning bones find themselves getting stronger but it will also aid your mind to relax and unwind.
If you are previously grief from osteoporosis, then try not to rush. Do some harmless twists in a chair to help. Just plant yourself in a chair, make sure your heels are under your knees and keep your torso straight as you slowly begin twisting to one side.
You will feel the twist from your lower back as it moves up to your spine. It is also important to evoke that you only twist as much to the point where the length of your torso is maintained. Do the exact same twist for the opposite side and try it with legs crossed next time.
So what are you waiting for? Get that Yoga mat out, put on your best yoga pants and some nice music as you do this in just 12 minutes.
There’s more to follow. So, read on or come back for more updates on health & beauty, celebrity entertainment , bio and news.
Recent News
-

Duane Chapman Is Now Engaged To Girlfriend Francie Frane, Had Lost Wife 10 Months Earlier
-

Katherine Schwarzenegger Pregnant With Her First Child With Husband Chris Pratt
-
Chris Cuomo's Son Mario Tested Postive For Coronavirus
-

Kodak Black And NBA YoungBoy, Dissing One Another Via Social Media
-

Maeve Kennedy McKean, Robert F. Kennedy's Granddaughter, is Missing Along With Her Son
Entertainment
-

The Evolution of Entertainment: Online Casting Calls Redefining the Industry
-
Mamoudou Athie's Must-Watch Performances in the Movies and TV Series
-
Try These Unique Forms of Entertainment When You've Exhausted All Options
-

7 Best Movies on Netflix This Week
-

Campus Grooves: Exploring Music Festivals in American Colleges